


Descender tie-off
Technicians have always had a wide range of methods and reasons for tying-off descenders. Traditionally this was because they wanted to use both hands for another task and Munter-hitches, Figure8 descenders, and belay plates were not “auto-stop”. Removing the brake hand from the brake strand would result in an uncontrolled descent for these “normally open” devices.
Now many people use “auto-stop” or “assisted braking” devices which assume a “normally closed” function when untended. These devices require some action to allow rope to move through. Thus, most require a control hand on the brake strand as well as the deliberate operation of a release mechanism.
One issue often not raised in instructions is whether or not these “auto-stop” devices require some additional security (ie tying-off) if left unattended when supporting a load. Is it sufficient just to ensure the control lever is in the “lock” position and walk away or should we tie an additional knot in the brake strand?
As usual, the answer to this question will depend on many factors:
- the security of the device’s “lock” position,
- the likelihood of accidental (or deliberate) attempts to unlock the device,
- the consequence of unintended rope travel through the device…
Each of these will vary from one situation to the next and thus there can be no single “it must always be done this way” answer.
For my work, my default assumption is that any time I walk away from a critical device, it must be left so that there is no reasonable doubt of its security. I will consider things like:
- unweighting of the system allowing slack to creep though,
- shifting or twisting resulting in physical interference with the “auto-stop” mechanism,
- human movement resulting in inadvertent interference,
- panic response from operators, rescuers, or victims,
- “slip” as a mode of non-catastrophic failure during overloading.
These considerations dictate that I normally go beyond the standard “lock position” and include some form of tie-off before moving my attention to another task.
Tie-off methods
Desirable features of any tie-off method should include:
- functional and secure,
- easy to remember and apply,
- able to be released under tension without slippage,
- able to be unlocked after a slip/overload event.
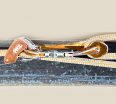
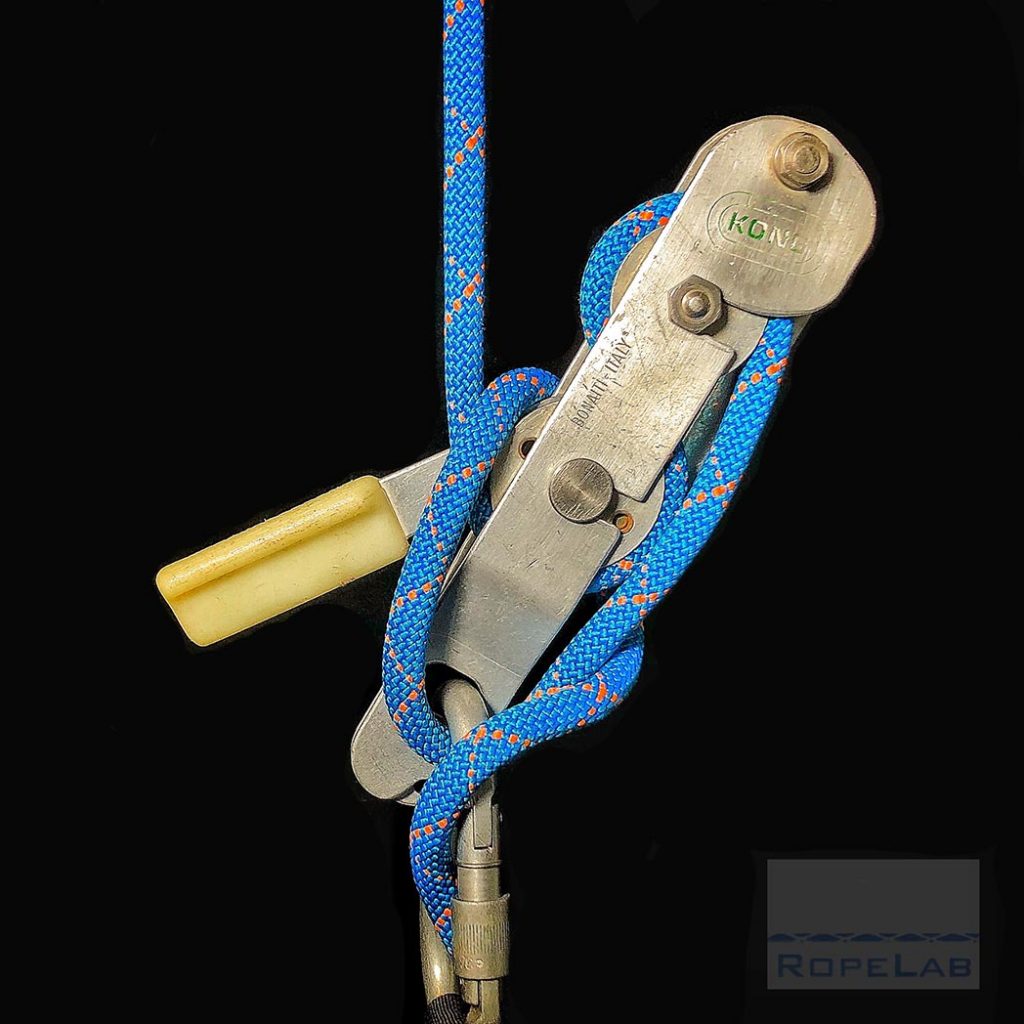
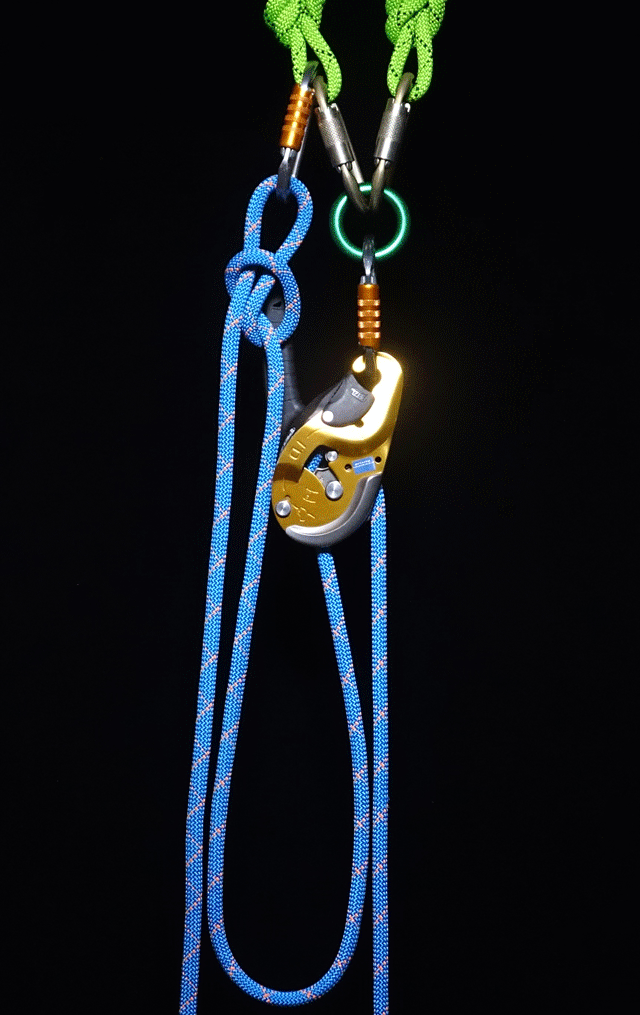
Of all the methods I have seen, the one that I find works with most devices and situations is that promoted by Petzl for their I’D.
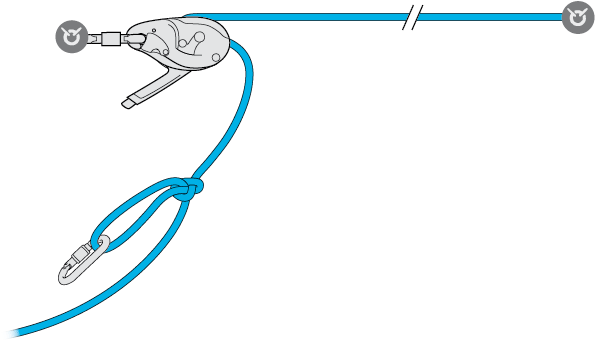
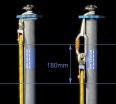
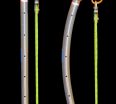
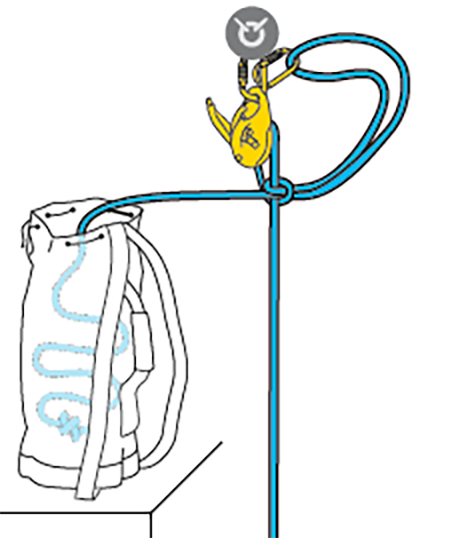
This method shows a slip-half-hitch tied 1m of rope away from the I’D and clipped to a carabiner. Note that this is for securing a tensioned line and the 1m tail is provided to allow some rope to “slip” through the I’D in the event of overloading the tensioned system. For other systems it may be desirable to place this slip-half-hitch right behind the device (such as shown by Petzl for “Releasable anchors with the I’D”)
The thing I like most about this slip-half-hitch is that it can be released easily even if the system is under load. The only shortcoming of this method is that the user must tie the slip-half-hitch in the correct orientation. It must be checked to ensure that it slips only on the strand away from the device.
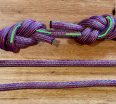
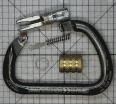
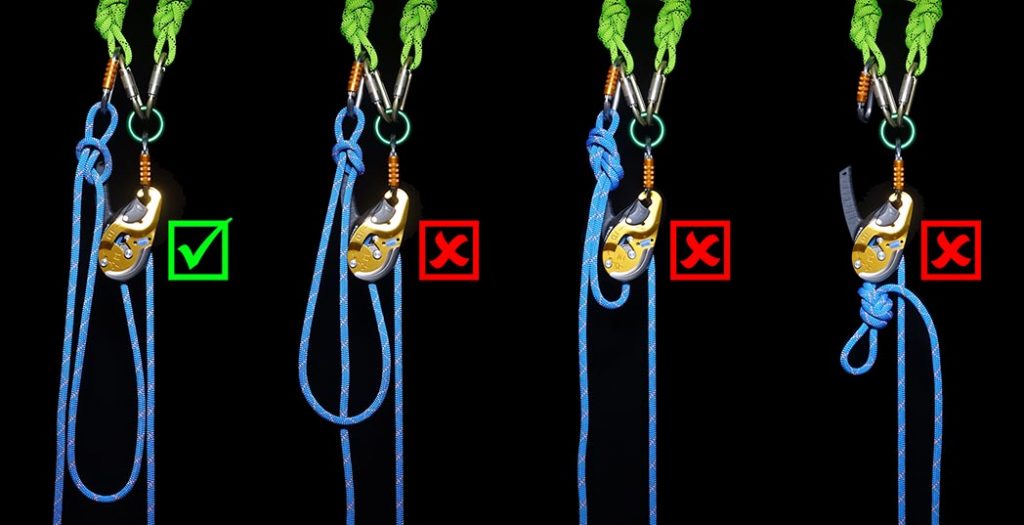
Possible problems
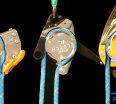
While any knot behind the device is better than nothing, the following image shows three that are less than ideal as, once they come into operation, the knots will be difficult to untie before completing the lower or the release of tension in the system.
Summary
The majority of “auto-stop” device manufacturers do not provide specific instruction on tying off their devices when left supporting a load and unattended. Adding a slip-half-hitch behind any of these devices is a very simple step. It is low cost and potentially has significant reward in the event of some unforeseen event.
© Richard Delaney, RopeLab, 2020


About The Author
Richard Delaney
Richard Delaney has worked professionally with ropes since 1992 as a multi-pitch rock-climbing instructor, technical rescue instructor and rope access technician. Understanding and teaching the Physics of Rigging is a core passion of Richard’s, one based on his experience, and his prior professional life as a qualified engineer.