


Prusik Self Belays
In mid-2015, an interesting rescue was undertaken in which a climber became stranded mid-descent with a prusik self-belay. Many of us have used and taught these systems, however this scenario was unusual and presents us with an excellent learning opportunity.
There are many options available for protecting a person descending a rope, however the two most commonly taught and used by recreational abseilers are:
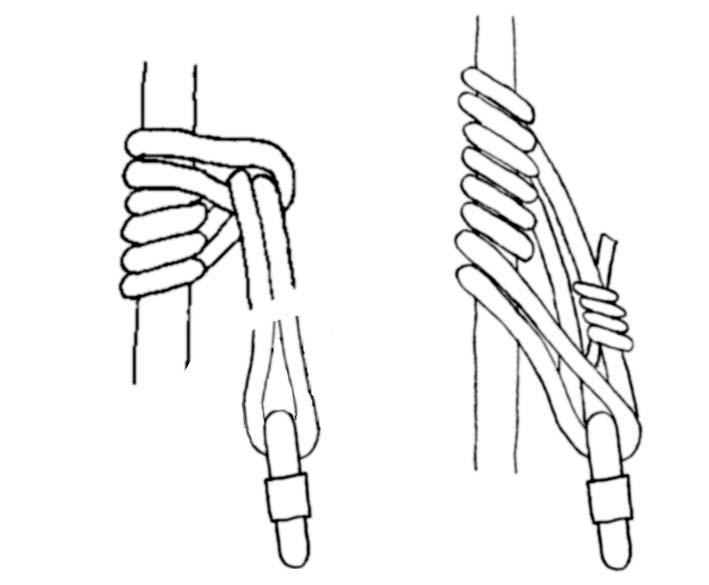
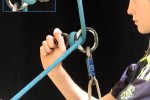
- A short prusik attached to the rope above the device and to the main attachment point of the harness. This prusik hitch is usually a 3-wrap “Classic” or “Klemheist”.
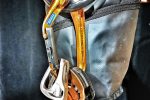
- A very short prusik attached to the brake rope below the device and then to one of the leg loops of the harness. The hitch used in this case is a multi (4 or 5) wrap “French”.
Like so many techniques in the roping world, if there was a ‘best’ way then there would be only one technique. The fact that there are many options stresses that each will have advantages and disadvantages in particular situations. Historically, I suspect that it took a while for abseilers to consider any option of self-belay. The idea probably developed by chance rather than design.
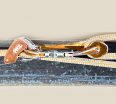
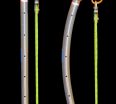
Prusik above the device
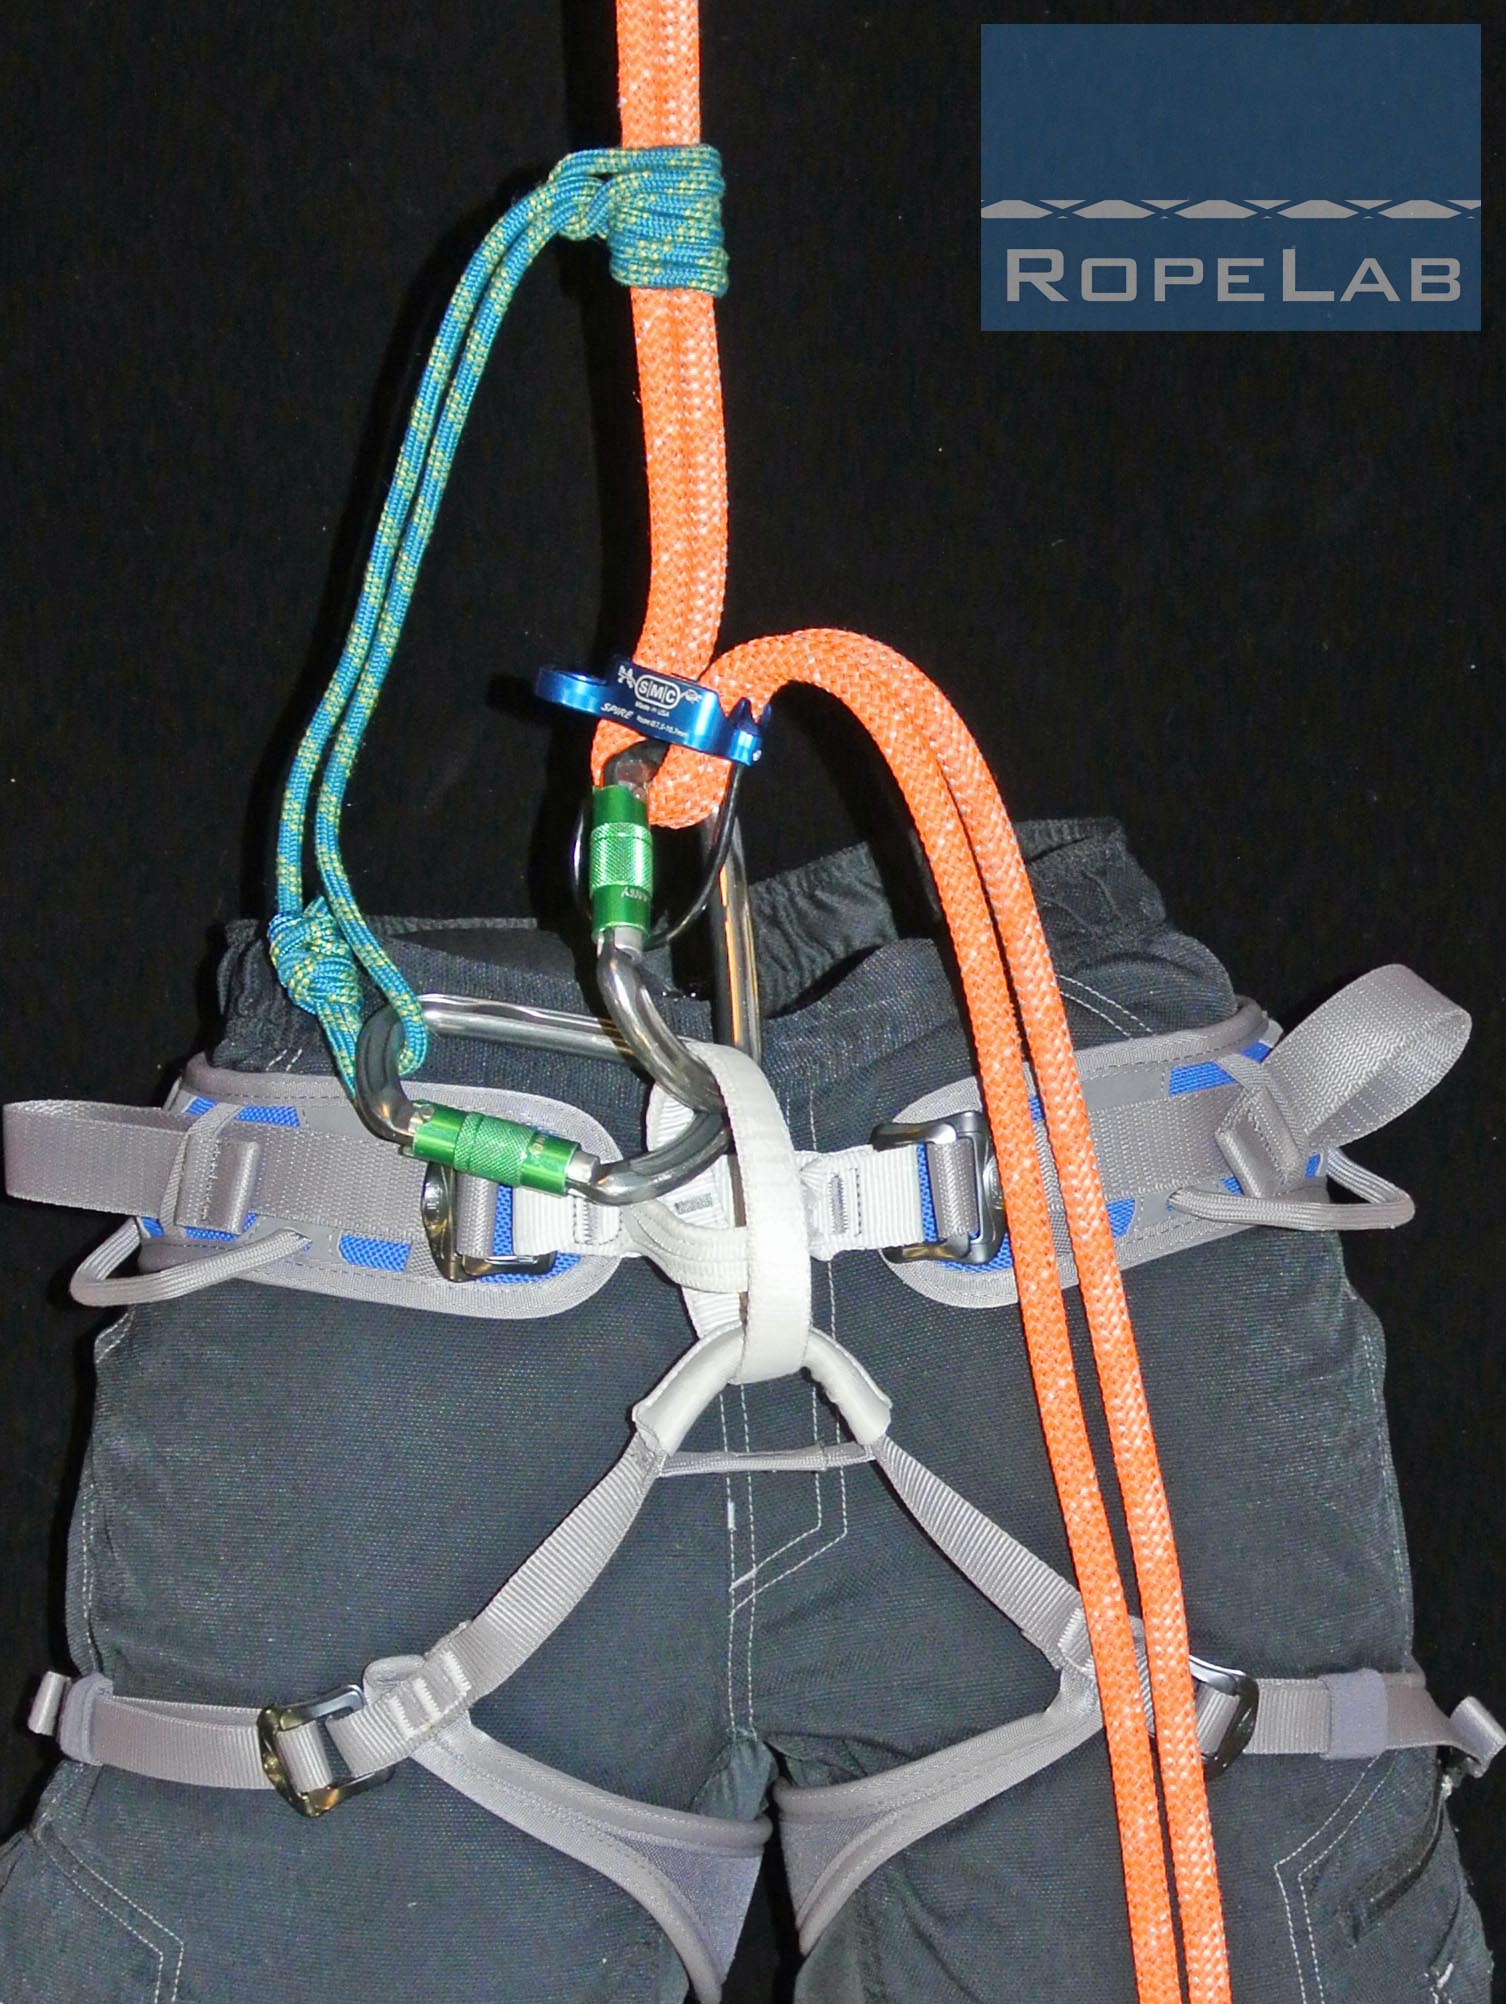
A common method of ascending the rope uses one short and one long prusik with both attached separately to the main rope with a suitable prusik hitch. Typically the short prusik loop will reach from armpit to wrist and the long from foot to navel.
The short prusik is clipped to the belay loop of the harness and the long, normally attached to the main rope just below the short prusik, hangs freely and provides a point of purchase for the climber to push up with one foot.
During this push, the waist prusik becomes slack and can be pushed up to provide a new, higher resting point on the main rope. Once sitting back in the waist prusik, the long foot prusik becomes slack and can then be pushed up the rope in readiness for the next move up.
Climbers often practice changes between ascent and descent on a free-hanging rope and typically realise that it is not necessary to remove the prusiks to descend, so long as they are managed with the non-brake hand and kept slack. At some stage people would have made the connection that having at least the waist prusik attached above the descending device achieved two positives:
- An easy transition from descent to ascent.
- A backup, or self-belay, that would prevent uncontrolled descent in any event where control of the brake rope is lost.
At some point in time it became common for instructors to encourage students to keep the waist prusik in place for the complete duration of an ascent/descent activity. If a student makes an error in attaching or threading their descent device then the worst that should happen during the ascent/descent transition is that they end up on a loaded waist prusik.
One obvious issue with the technique is that it is prone to catching during descent. Once locked, the student must have a system to completely unweight the waist prusik in order to unlock it and resume the descent. The two common options here are:
- Long prusik: Place the long/foot prusik on the rope and stand up.
- Foot wrap: wrap the brake rope around a slightly raised foot, bring the tail up and grasp it firmly against the rope above the locked prusik and then stand up.
Both these techniques, especially the second, require practice and competence before heading out into the real world.
There have been many instances where people have not managed these techniques well and become stranded on a rope with a prusik hitch loaded above their descending device. In scenarios such as light-weight rescues where a person manages a two-person descent through a single descending device, it would be very difficult to free a prusik above the device if loaded using these methods. Using a prusik below the device presents an alternative self belay method.
Prusik below the device
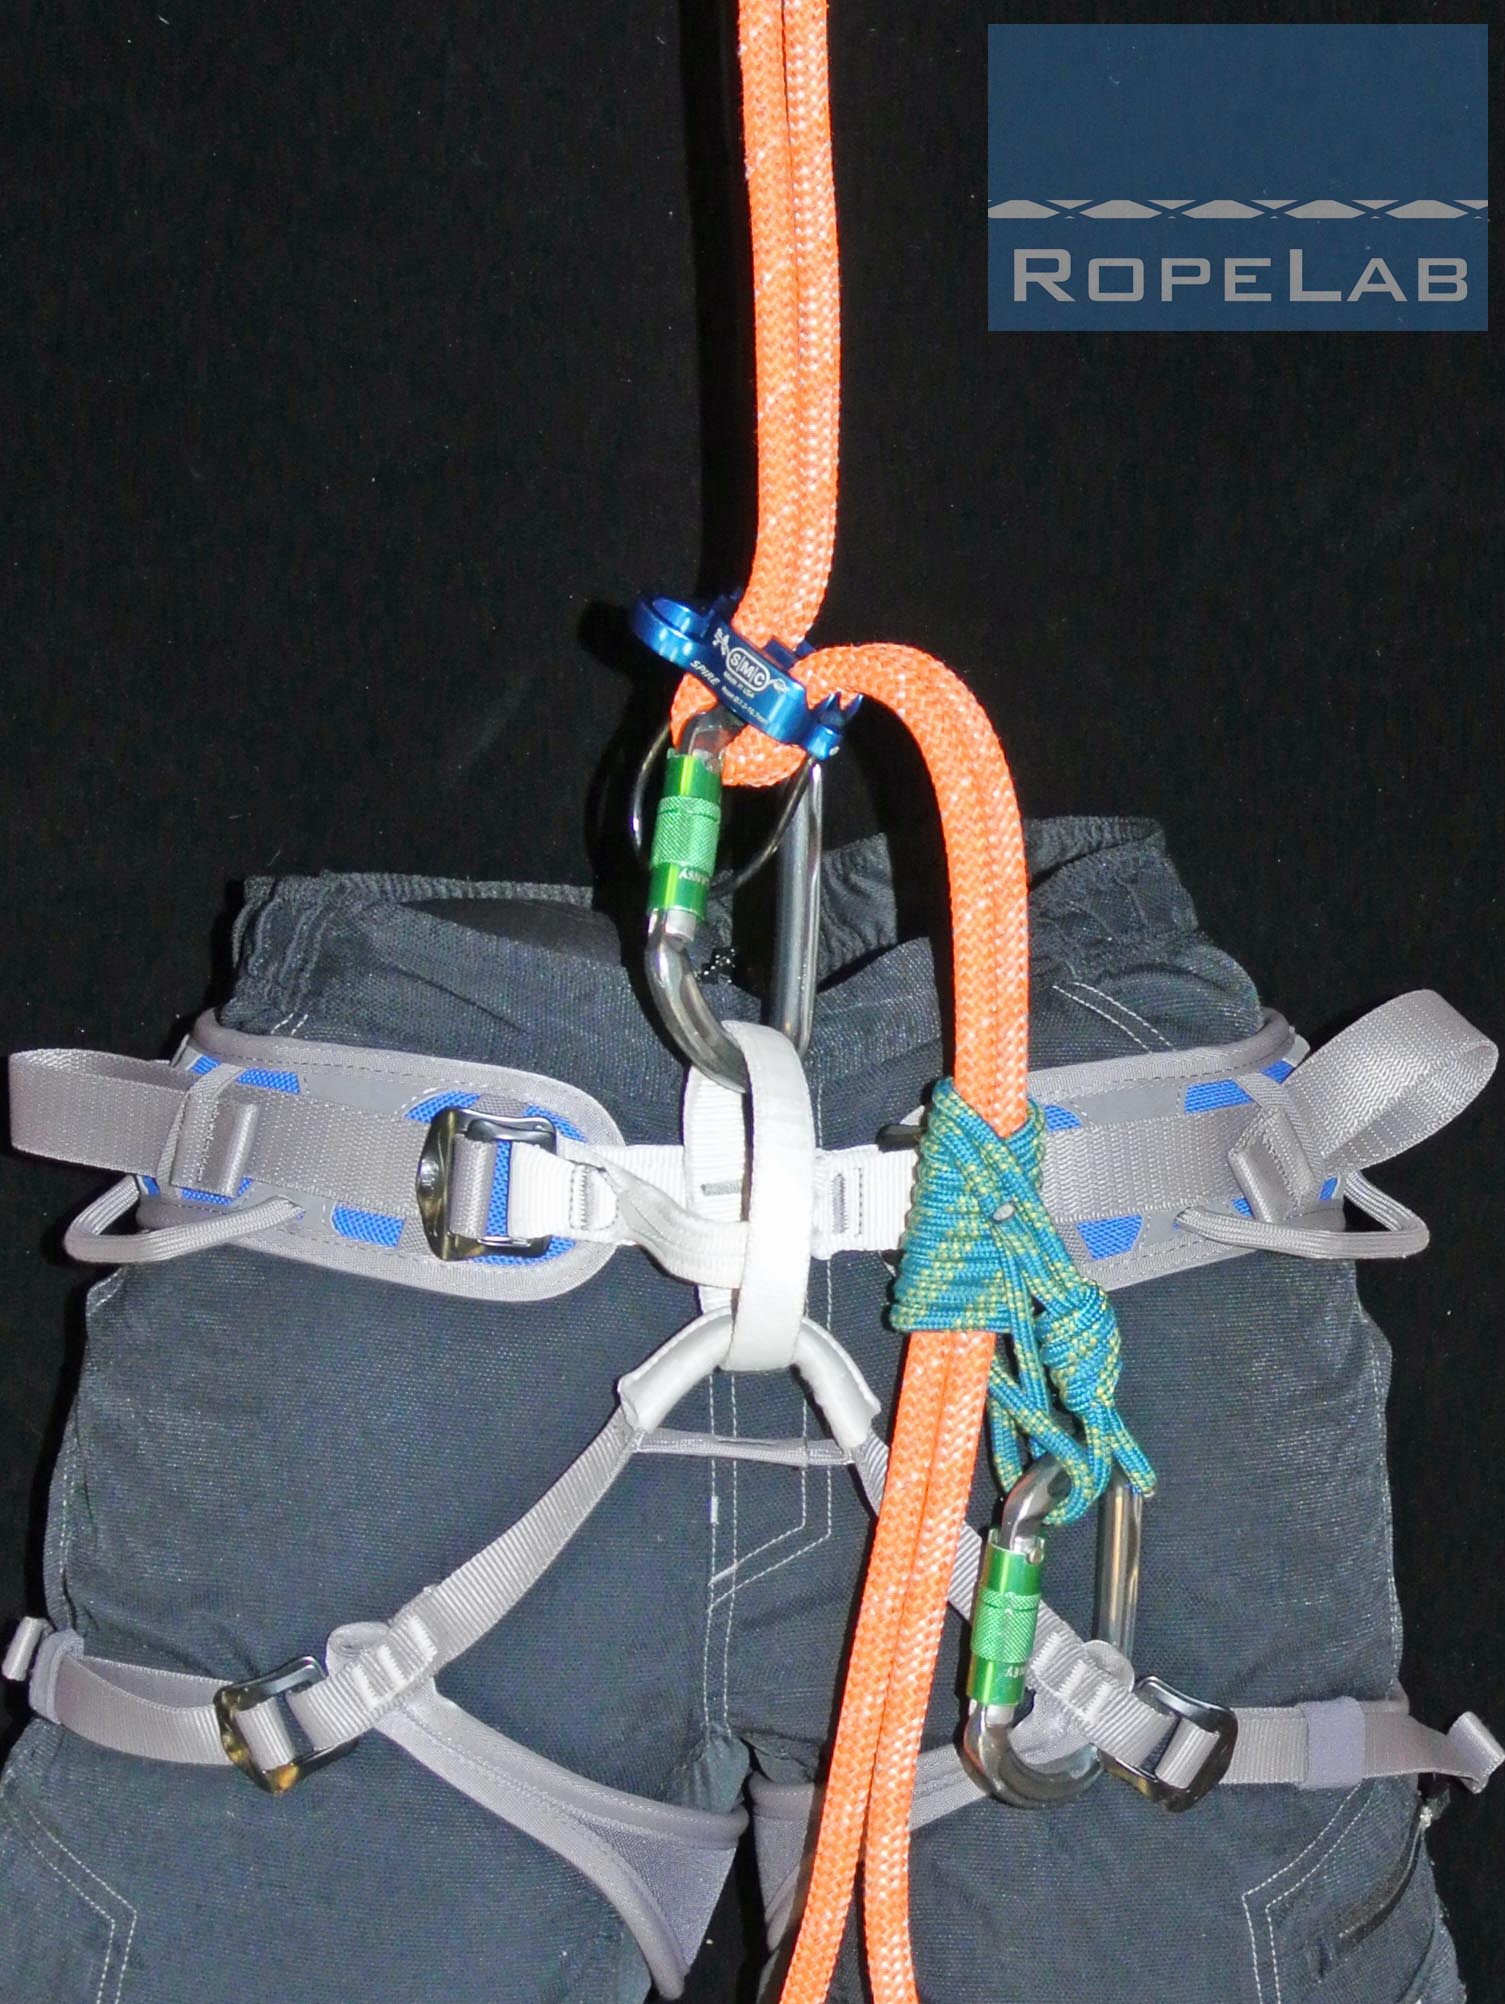
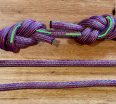
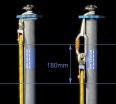
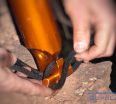
While the origin is unclear, a new technique was suggested which involved placing a very short releasable “French” prusik hitch on the brake rope below the device which would be anchored to a leg loop of the harness.
One key consideration when using this method is that the prusik must be so short that it can never slide up and reach the descending device. If the prusik does come in contact with the device then it will certainly not function as an auto-block – unless it enters the device and becomes tangled.
Other prusik hitches may be used here, however the “French” prusik has the advantages of being compact and that it can be released under load. Simply wrap your hand around the bound hitch and pull it down.
It should be made very clear that harness manufacturers do not encourage or explicitly permit this technique. However, given that this prusik will only ever have to apply a tension equivalent to that of the brake hand, it would be unlikely that it would ever have to support more than 0.2kN (about 20kg static mass).
Advantages of this system include:
- Particularly with the “French” prusik, it is very easy to unlock. The brake hand simply “bumps” the prusik and descent can be resumed.
- The whole braking and backup system can be operated by the same hand which may leave the other hand free to fend off obstacles or tend to a patient.
- Edge transitions don’t present a hazard to either the prusik or the hand tending it (they would if it was above the device).
Discussion
There are certainly advantages and disadvantages with both systems. Having taught both since the early 1990’s, I have only recently become aware of another potential issue.
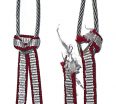
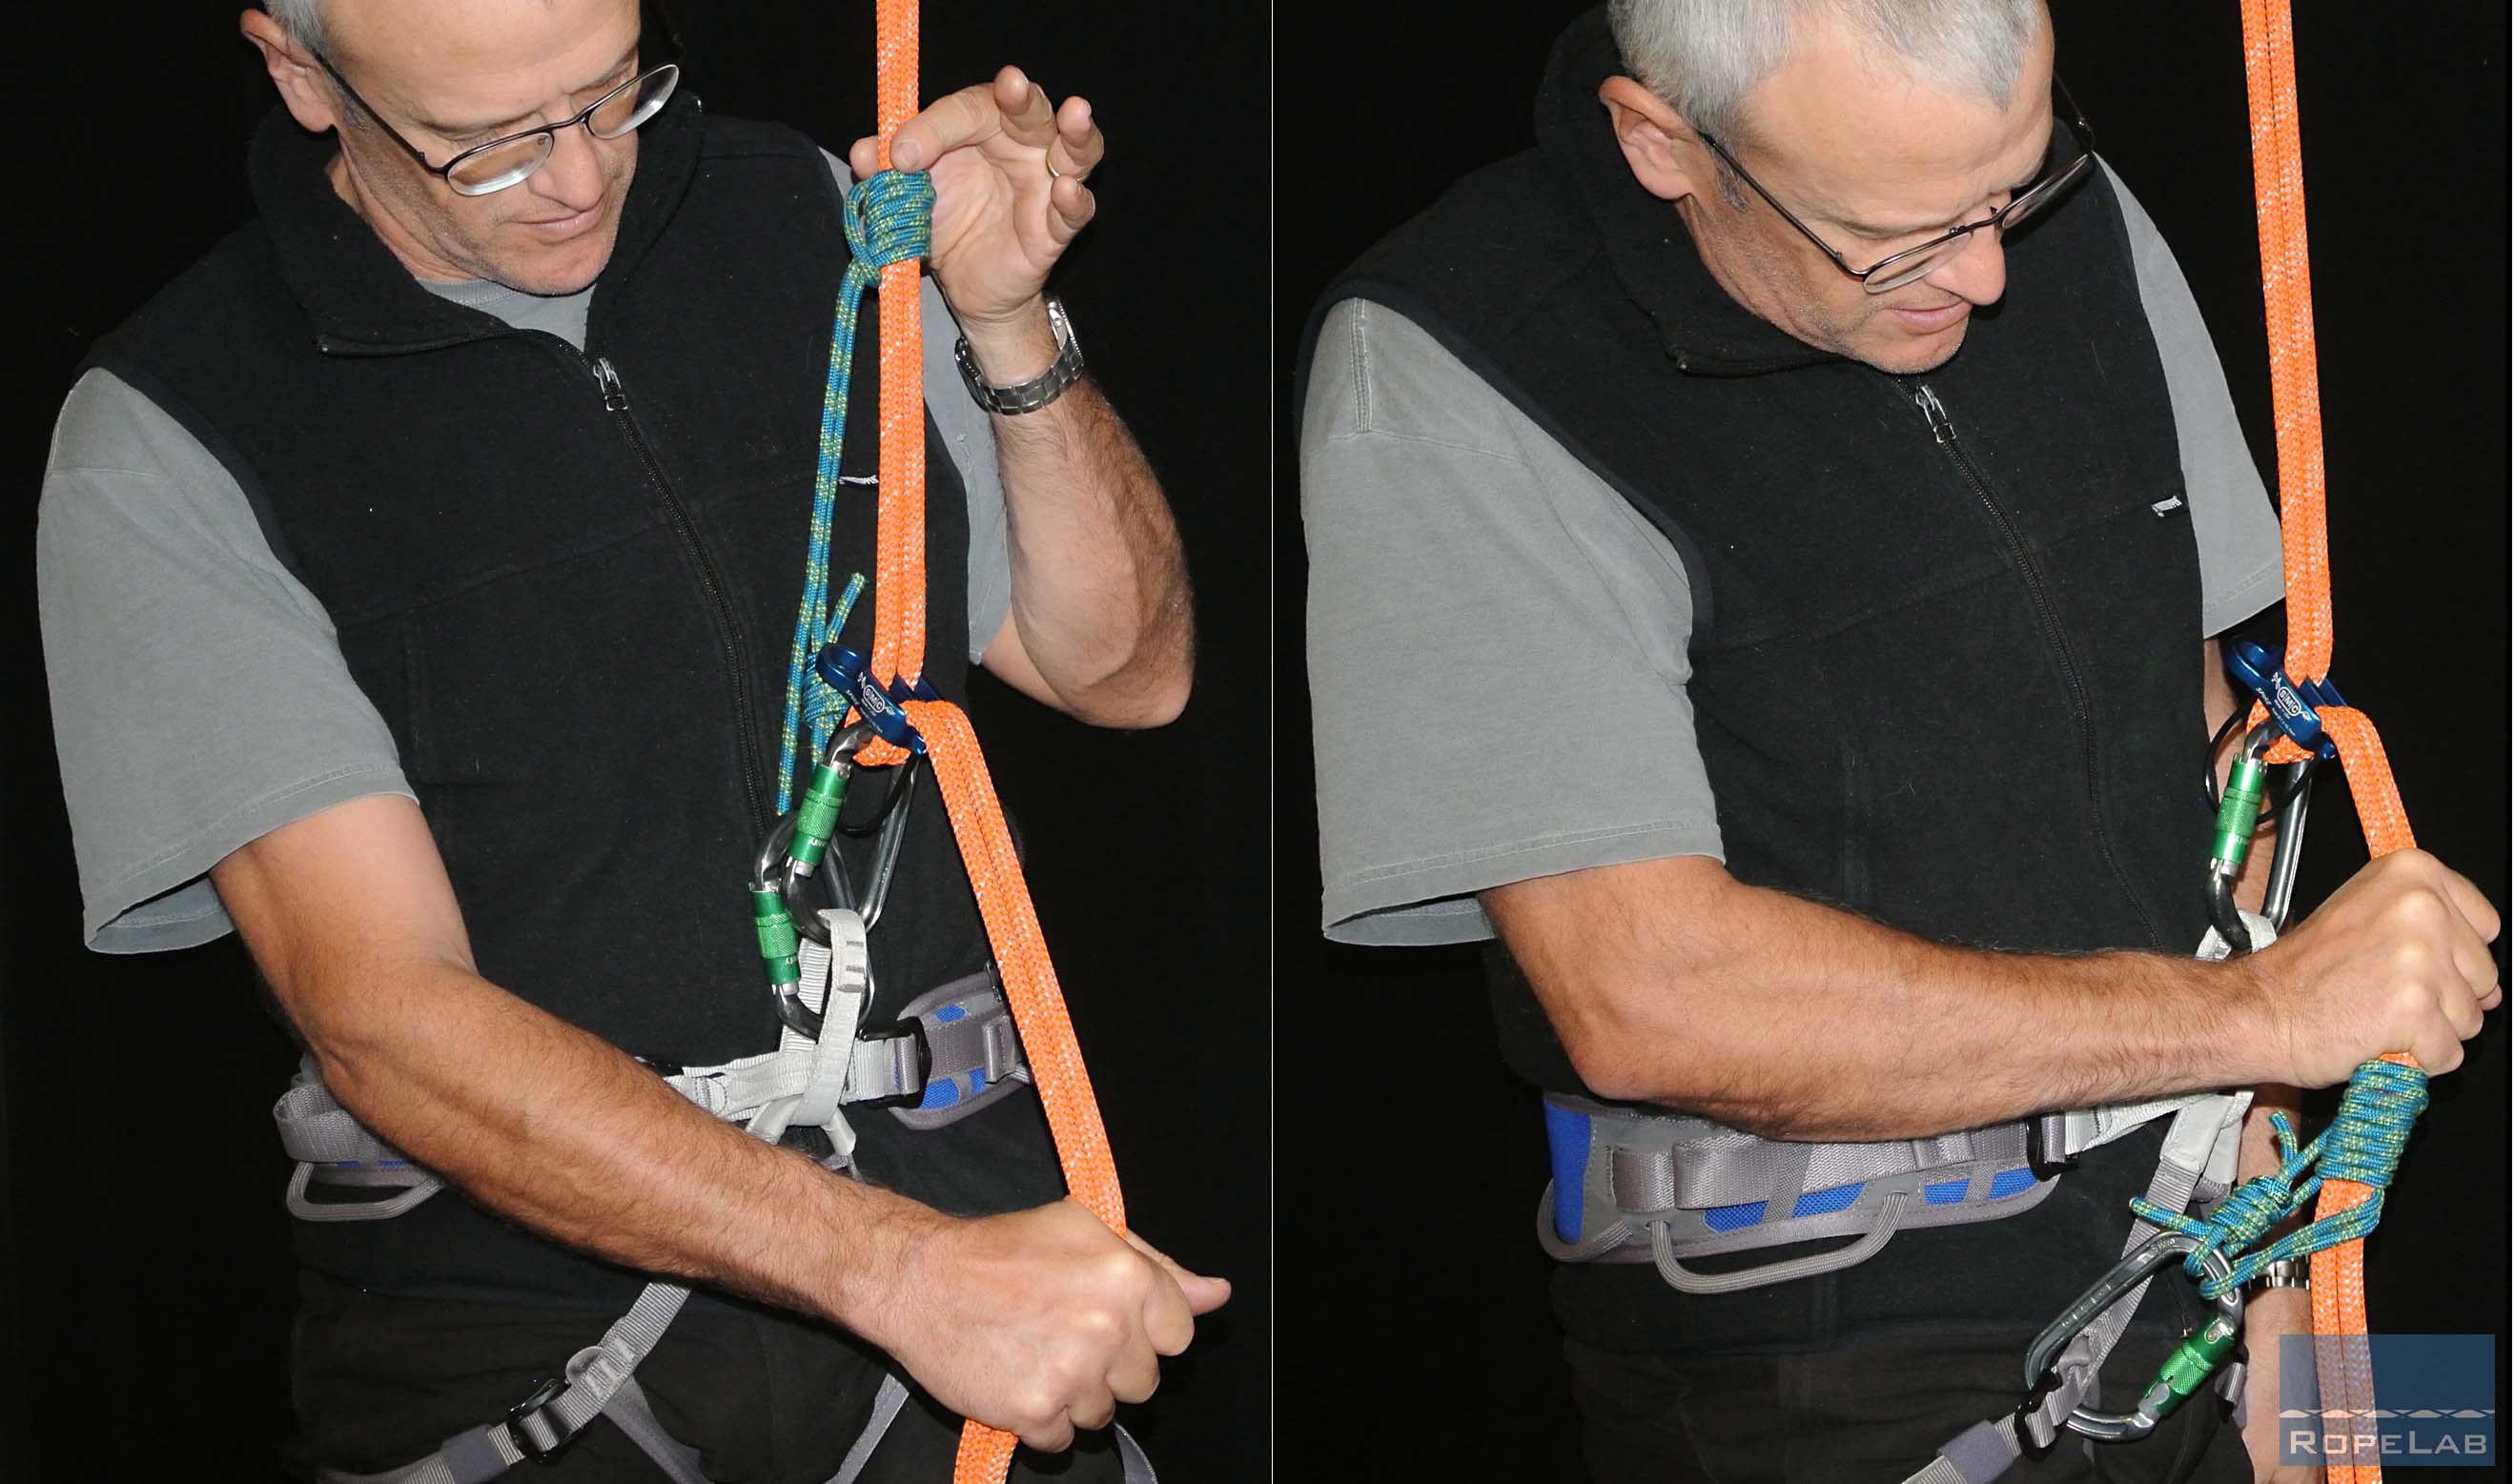
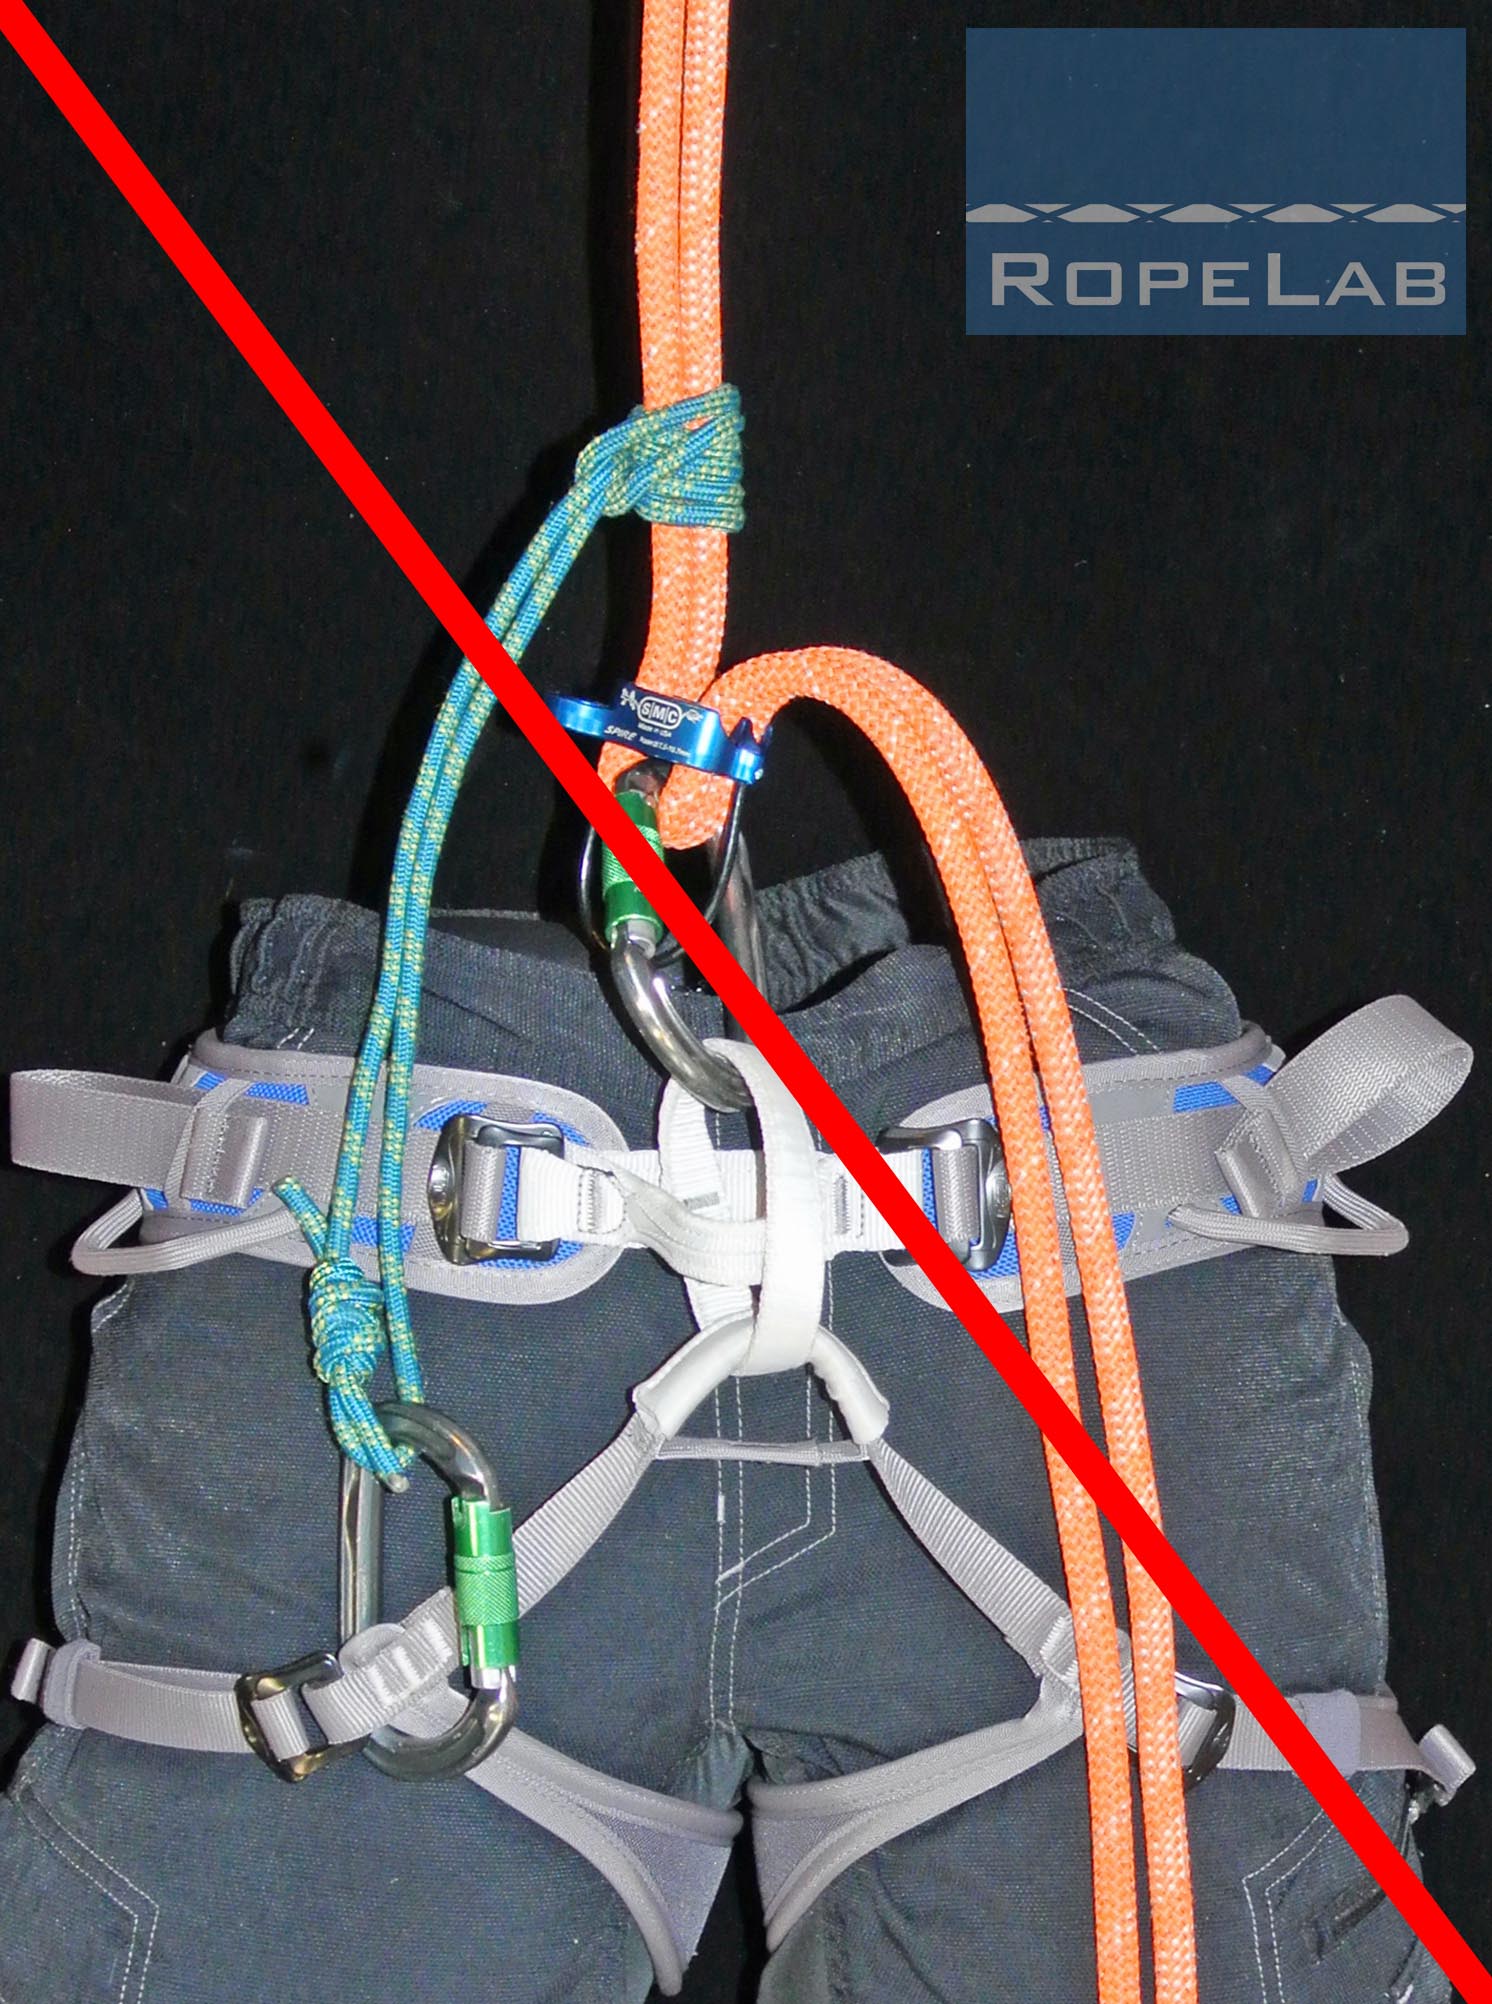
An experienced climber had an incident where he inadvertently tied the prusik hitch above the device AND clipped it to his leg loop. I have never really considered this possible error before but would certainly recommend that it is presented in every lesson covering self-belays.
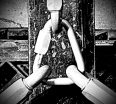
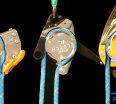
The climber was abseiling down an overhanging pitch to access a multi pitch climb. Part way down, his self-belay has become loaded and the resulting situation could easily have been fatal.
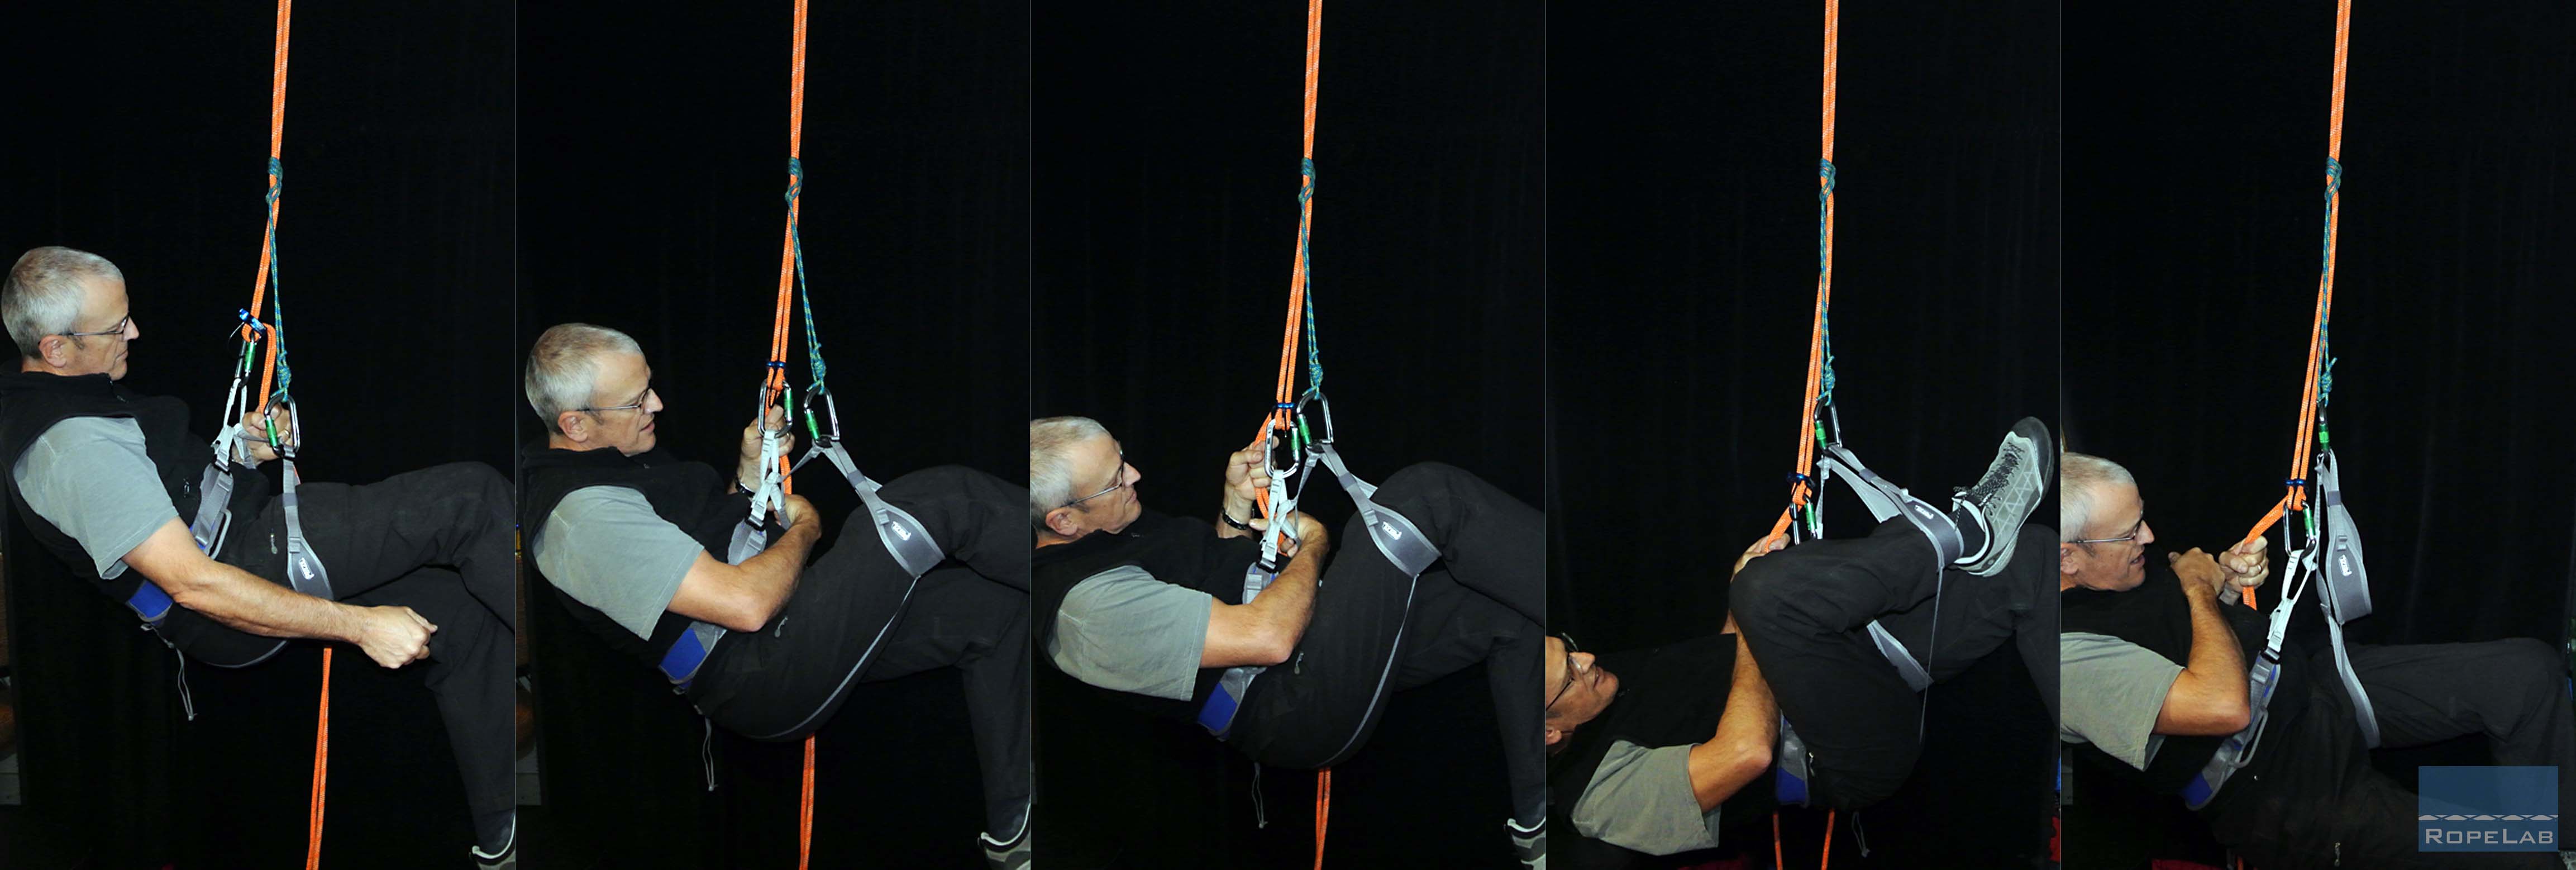
In reconstructing this incident for these photos I cannot stress how uncomfortable it was. As the prusik became more and more loaded it pulled the leg loop higher and higher. Eventually, with the leg loop above my head, it seemed logical to take my leg out of that loop in an attempt to increase comfort. The climber did this also. Once the leg was out it was still a very uncomfortable position with significantly more force now on the higher-than-normal waist belt. If the descent device was not locked off then we have also created the situation where the entire weight is being supported by an unrated leg-loop. This is a situation which would certainly not be condoned by harness manufacturers.
The climber’s partner called for assistance from the top of the pitch and, fortunately, assistance from the local emergency services was both prompt and efficient. The climber stated that he was suspended for at least 90 minutes and probably would not have remained conscious if he had remained in that position for much longer.
This incident where two self-belay techniques have been confused is an incredibly valuable learning experience. It has now happened at least once and it is quite foreseeable that it could happen again. When training others or using these methods of self belay, be mindful of the potential for confusion. Above all, be practiced and prepared for a range of scenarios.
Eduardo José Slomp Aguiar has been kind enough to translate this article into Portuguese. We are grateful for his input. The Portuguese translation can be found here.
© Richard Delaney, RopeLab, 2015
Related Posts

About The Author
Richard Delaney
Richard Delaney has worked professionally with ropes since 1992 as a multi-pitch rock-climbing instructor, technical rescue instructor and rope access technician. Understanding and teaching the Physics of Rigging is a core passion of Richard’s, one based on his experience, and his prior professional life as a qualified engineer.
Add a Comment
You must be logged in to post a comment.
An excellent article pointing out a significant error for a commonly used practice. As leg loops are unrated the use of them attaching a self belay should evidently be avoided regardless of where the self belay is connected to the rope.